

 Managing an effective merchandising program for your event does not need to be a daunting task. Once you’ve reviewed all of the factors important to your event (previously covered in our article featured in the November/December 2011 issue) and you’ve made the decision to move forward, it’s time to get started.
Recruit your team and start your planning by hosting a brainstorming session. If possible, your merchandise team should include individuals who have an understanding of the mission of the event, have had experience in retail operations, and are willing to put in some long hours. It would be very helpful for some or all of the team to have a creative flair.
There are three areas that will become the foundation of your successful merchandising program and these should be reviewed in detail during your first meeting. First consider the graphic elements of your event. Undoubtedly, decisions have already been made regarding an event logo, or even multiple logos. Logo design is a critical part of establishing the identity of your event and it may even stand alone in delivering a powerful and important message. Have a clear understanding of what the designers had in mind for the logo, paying particular attention to both the color specifications as well as the number of colors. Font style and size will play a role in how the logo will impact your final merchandise selection.
If your event has some history, in all likelihood there is a traditional logo and the design elements have been set which often dictate the limitations and use of the logo. It will be very important for your team to understand those elements and limitations at the beginning of your planning. Additionally, many events may have one or more sponsors who are part of the logo design and you will need to keep that in mind during your design phase. Ultimately, being comfortable with your logo will make your planning process go much more smoothly.
 The second factor in your planning is the message of your event. Eventually, all of the items selected for your merchandise program should support the objective of the event, either helping extend the message directly, or providing a mechanism to communicate the purpose or cause of the event in the future.
The term memorabilia comes to mind for a reason. Participants and attendees buy merchandise because it gives them an opportunity to bring the event home either for themselves or for others. With an understanding of the design elements and the messaging of the event, your team will be in a great position to identify a broad range of products that will be suitable for a viable merchandise program.
The third and final key element is a clear understanding of the environmental factors surrounding your event. These environmental considerations include the type of event; where, when, and how long it is occurring; the demographics of the audience, and the time of year. All of these items will guide your team in selecting items that will appeal to buyers.
Finally, establish a timeline that will identify key dates for everyone involved in your merchandise plan. Working backwards from your event date your timeline would include:
• Event Date
• Merchandise In-hands Date – 3 weeks prior to Event Date
• Merchandise Program Launch Date- 6 weeks prior to Event Date
• Merchandise Order Date – 12 weeks prior to Event Date
• Vendor Selected – 14 weeks prior to Event Date
• Merchandise Items Selected – 16 weeks prior to Event Date
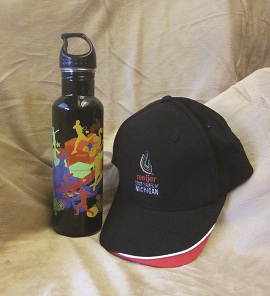
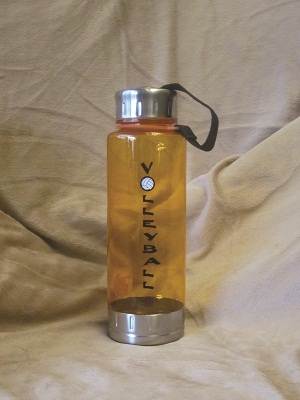
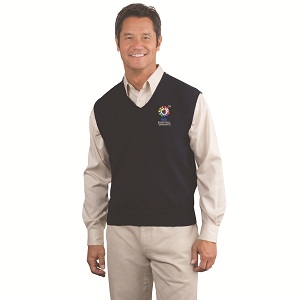 Your merchandising team is now prepared to make their initial attempt at general item selection. In the interest of keeping the program management as simple as possible, limit the count to a conservative number ranging between 15-25 different SKUs with the majority of the products being wearables. At this point, don’t be too concerned about specific items. Your major category list could look like this:
T-Shirts
Sunglasses
Golf Shirts
Window Clings
Windshirts
Lapel Pins
Performance Wear
Golf Balls
Baseball Caps
Key Chains
Sweatshirts
Drink Tumblers
Seat Cushions
Decals
Stadium Blankets
Rally Towels
Once your list is complete, work with a professional promotional products supplier (or suppliers) to assist you with identifying specific items. You should request a formal presentation asking them to provide items, color choices, size options, and of course pricing. A good supplier will be prepared to handle much of the ground work from here on to provide you with a package that is both creative in its design and functional in its execution. As a rule of thumb, plan on giving your bidders two to three weeks to research and prepare their offers. Make sure they understand that there are multiple suppliers bidding for the work.
 After supplier presentations, you should be able to make final decisions on what you want to include in your merchandise program. Prepare your final merchandise plan, and finalize all the associated costs including decoration (embroidery, screen printing, etc.) and freight. Build a pricing model that will ensure the event will make a profit even if all of the merchandise is not sold. Review the program with experienced event professionals and make any necessary adjustments. Ask your supplier to assist you with preparing sales sheets or brochures. Many suppliers have graphic artists who can help prepare professional sales sheets and who can place your event logo on images. At the very least, they should be prepared to provide you with high-definition photographs of every item you order.
Now is the time to incorporate the merchandise project into your event’s operational plan. It may be desirable to communicate available merchandise to attendees prior to the event. Most events are communicating important information regularly to prospective and registered participants and virtually all are now using web sites and social media to reach their audience. Implement a pre-event order form and get the information onto your event website and Facebook page. Plan regular tweets with notifications of product availability, and be prepared to handle orders well in advance of the start of your event.
In setting up for your event, plan your selling locations carefully. Remember, you’ll want to have available merchandise in front of participants and fans as many times as possible. A booth or selling location near registration and close to entrance ways to your event is very desirable. Staff your selling locations with volunteers who are outgoing and boisterous. Collect and track your receipts every day and watch inventory levels closely. Plan your final day fire-sale accordingly to minimize any potential leftover merchandise. Make an extraordinary effort to sell all remaining inventory before the close of the event.
 Upon completion of the event, remaining merchandise can be reviewed to determine whether any or all of the times can be used at future events. Merchandise can be used to recognize special efforts by volunteers or team members. If the material is not usable in future events, consider donating items to non-profit groups in your community.
Defining the success of your merchandise program should first start with a review of the goals and objectives you established in the beginning. Resist the urge to use profitability as your only assessment criteria. Of course, making a substantial financial gain from the sale of logoed merchandise would be a terrific outcome, but remember that ultimately, the mission and message of the event is very likely far more important than any financial consideration. If you followed all of the steps in planning your merchandise program and managed the detail in a careful and conscientious manner, you will find success.
About the Author
